Setting Up Out of Office Messages
Introduction: This manual will guide you through setting up an automatic out of office (vacation) message in Roundcube webmail. When enabled, this feature will automatically reply to incoming emails with your custom message while you're away.
1Access Your Webmail
- Open your web browser and navigate to one of these addresses:
- https://webmail.webtic.net (primary)
- https://mail.webtic.net (alternative - redirects to the same location)
- Enter your username and password in the login form
- Click the LOGIN button
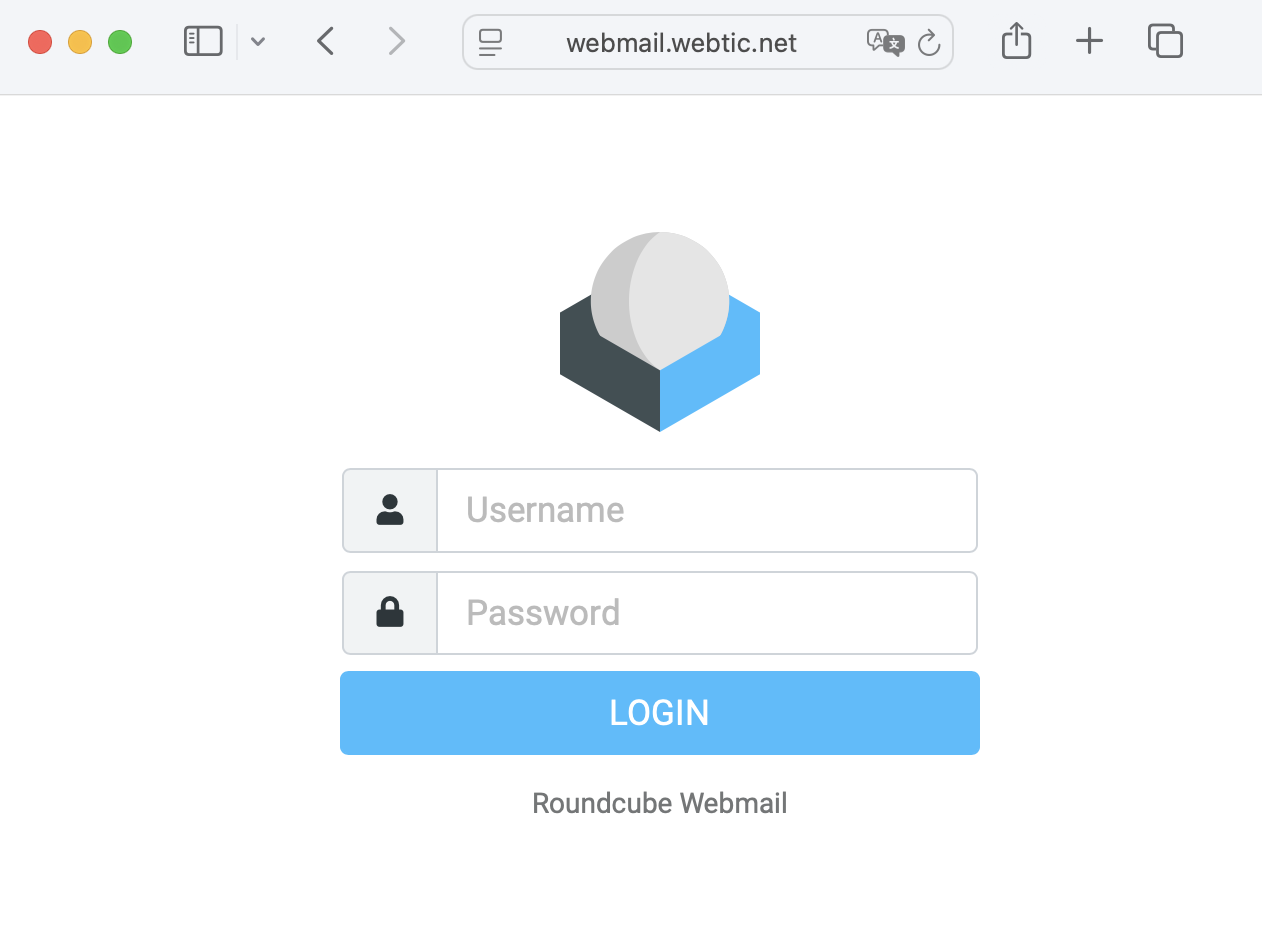
The Roundcube webmail login screen
2Navigate to Filter Settings
Once logged in, you'll need to access the filter settings:
- Click on Settings in the left sidebar menu
- Click on Filters from the settings menu
- Click the Create button (with the + icon) in the top right area
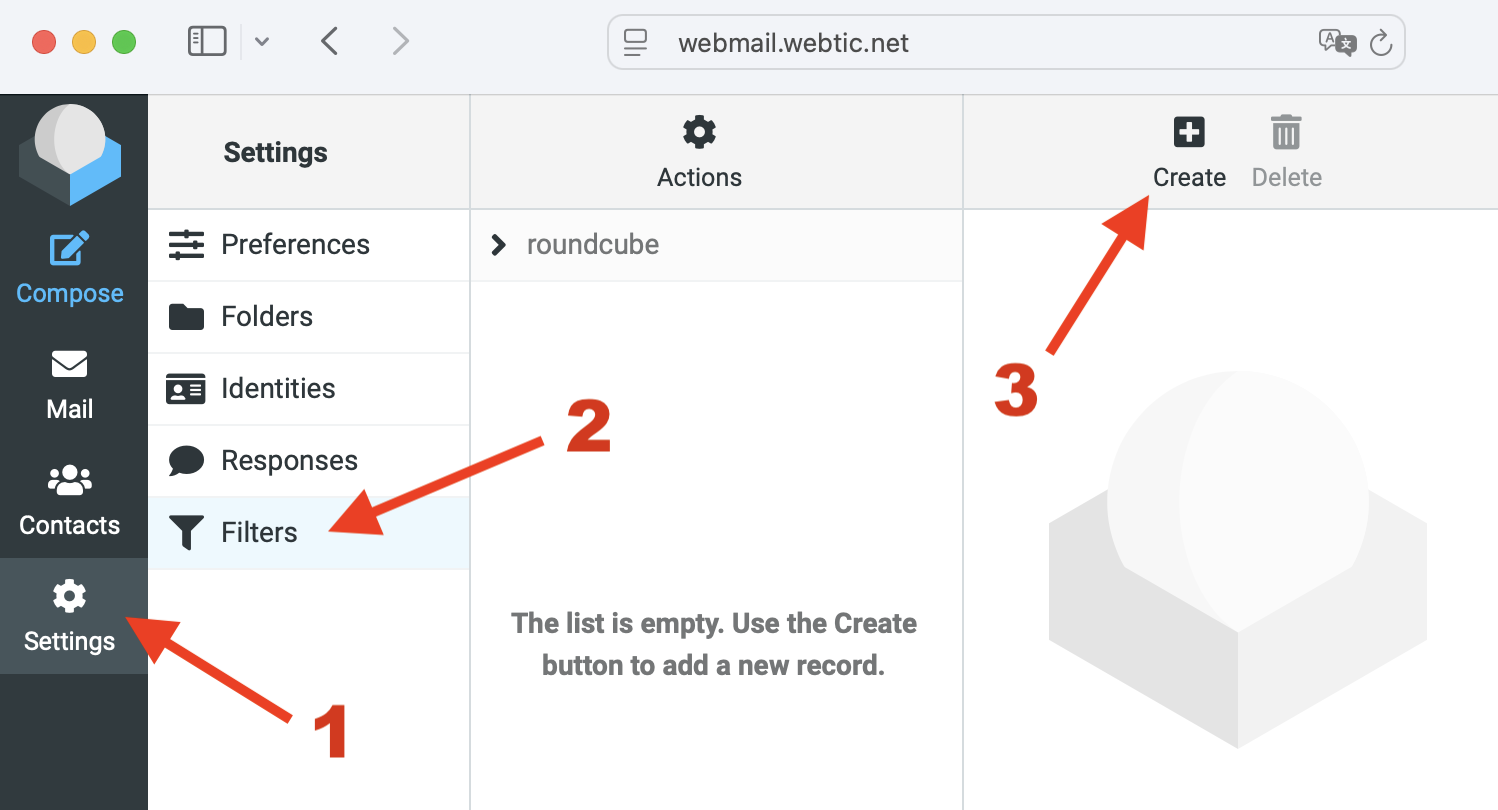
Navigate through Settings → Filters → Create
3Configure Your Out of Office Filter
Now you'll set up the actual out of office message with the following settings:
Basic Filter Settings
- Filter name: Enter a descriptive name (e.g., "Vacation", "Out of Office") - this is for your own reference only
- Filter enabled: Make sure the toggle switch is turned ON (blue)
- Scope: Select "all messages" from the dropdown
Action Settings
- Actions: Select "Reply with message" from the dropdown
Message Content
- Message body: Enter your out of office message. Example:
I am out of the office until the good times are back.

Best of luck,
John Smith
- Message subject: Enter the subject line (e.g., "Out of office")
Advanced Settings
- Reply sender address: Leave this field empty (the system will use your default address automatically)
- My e-mail addresses:
- Enter your email address manually, OR
- Click "Fill with all my addresses" for automatic population (recommended)
- How often send messages:
- Choose 1, 2, or 3 days
- If you set this to 3 days, someone who sends you multiple emails every day will receive 1 auto-reply every 3 days
Save Your Settings
- Click the blue Save button to activate your out of office message
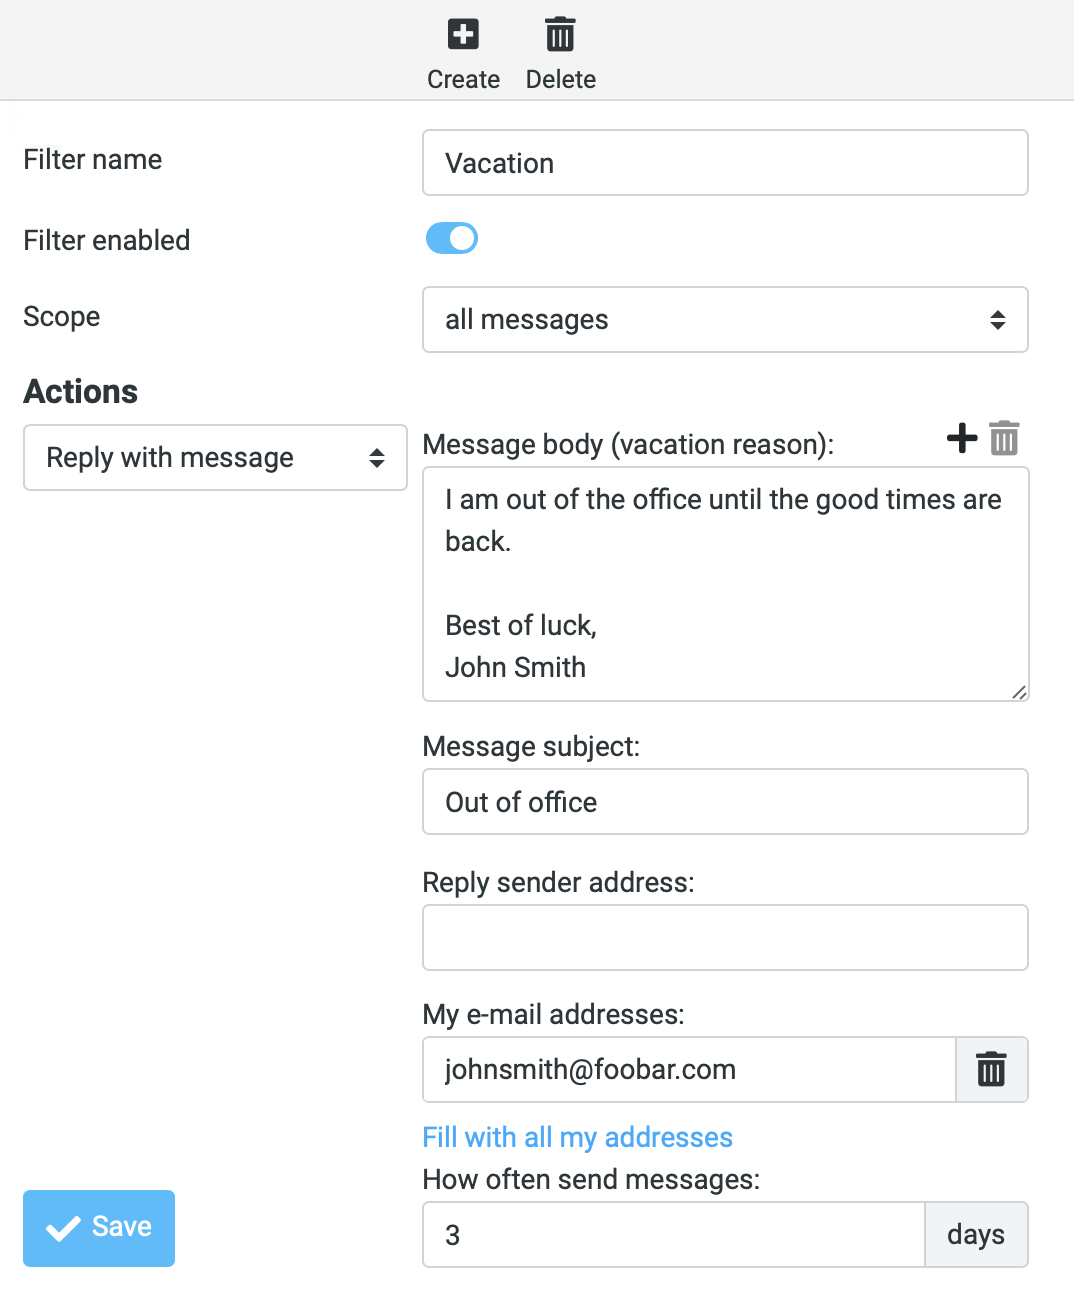
Complete filter configuration screen
4Managing Multiple Email Addresses (Advanced)
If you receive emails at multiple addresses (e.g., same name with different domains like .com and .net), you'll want to ensure your out of office message works for all of them.
Adding Multiple Addresses
- In the "My e-mail addresses" section, you can add multiple email addresses
- Press the Enter key after each address to add a new row
- Each address will appear in its own field with a delete button (trash icon)
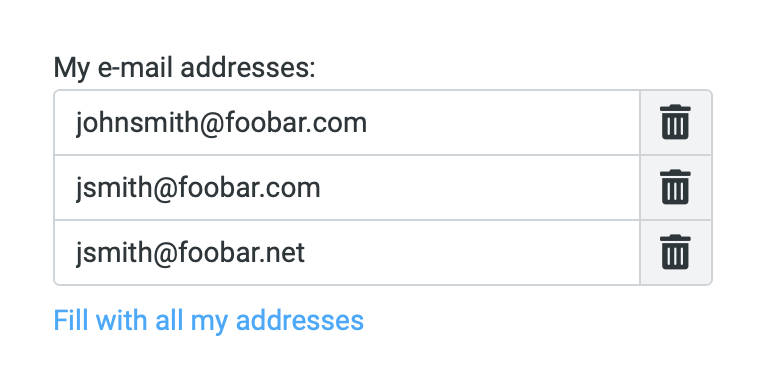
Example showing multiple email addresses configured
Alternative Method: Using Identities
For future convenience, you can set up all your email addresses under Settings → Identities. This makes them available for automatic population in filters and other features.
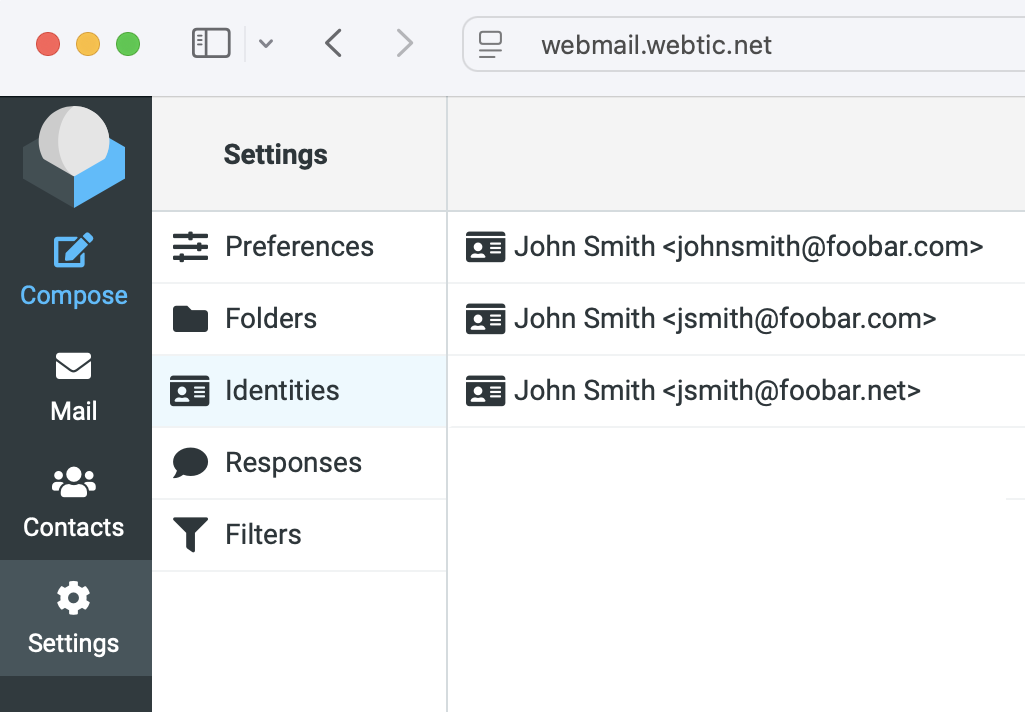
Settings → Identities showing configured email addresses
Important Notes
Activating and Deactivating
- Your out of office message will remain active until you manually disable it
- To disable: Return to Settings → Filters, edit your filter, and turn off the "Filter enabled" toggle
- To modify: Edit the existing filter rather than creating a new one
Troubleshooting
If the auto-reply isn't working, check that:
- The filter is enabled (toggle is blue/on)
- Your email address is correctly listed in "My e-mail addresses"
- You've clicked "Save" to apply changes
- If you have multiple email addresses, make sure all relevant addresses are included in the filter